Sanoli's Kitchen: Baking Partners.
Showing posts with label Baking Partners.. Show all posts

Saturday, September 15, 2012

HOMEMADE OREO COOKIES: FAUXREOS


Baking Partners, a baking group created and hosted by Swathi Iyer, I am a part of this group, this time Baking Partners decided to go with the theme cookies. Being part of the 'Baking Partners - A Group of Home Bakers' , our challenge for this month, suggested by Reeni of Cinnamon spice and everything nice is Homemade Oreo Cookies: Fauxreos adoted from Serious Eats.

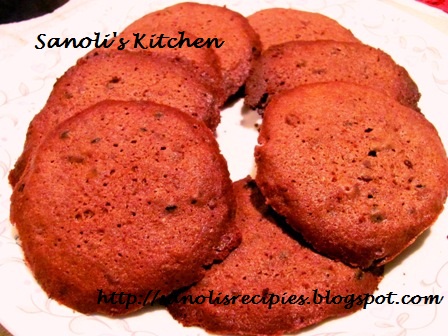
Very delightful and crunchy, with an intensely chocolate, not too sweet taste, very dark in colour; this cookie tastes divine. This homemade version comes close to matching the taste of those wonderful cookies. The texture here little different, as I wanted to give a square shape. it tastes really awesome!

INGREDIENTS:

FOR COOKIES:
3 OZ / 85 gm/ 6 tbsps Unsalted Butter, at room temperature
3/4 cup Sugar
3 tbsps Dark Brown Sugar
3/4 tsp Salt
1/4 tsp + 1/8 tsp Baking powder
1/4 tsp Baking soda
1/2 tsp Instant Coffee powder
1 1/2 tsp Vanilla Extract
2 Egg Yolks
3/4 cup All Purpose Flour, sifted
3 OZ / 85 gm / 1 cup Cocoa powder, sifted

FOR THE FILLING:
2 OZ / 56.7 gm / 4 tbsps Unsalted Butter at room temperature
5 OZ / 141.7 gm sugar
1 tsp Vanilla Extract
A pinch of Salt

SPECIAL EQUIPMENT: If you cut cookies in round shape, cookie cutter is required (but here I cut cookies in square shaped so I didn't use cookie cutter) and ziploc bag or pastry bag.
METHOD:

TO MAKE COOKIES:
Using a hand mixer set to medium speed, cream together butter, both sugars, salt, baking powder, baking soda, instant coffee powder and vanilla extract until combined. With mixer still running, add in egg yolks one at a time.
Once incorporated, shut off mixer and scrape bowl down with a rubber spatula.
Turn mixer to its lowest setting. Dump in flour and cocoa powder all at once. The mixer will be stiff. Continue mixing until uniform. Shut off mixer.
Use a spatula to scrape the dough from the bowl and knead lightly to form a smooth ball.
Use your hands to flatten into a disc.
Preheat oven to 350 F. Sift some cocoa powder onto the counter (using cocoa instead of flour gives the fauxreos their uniquely dark colour). Use a rolling pin to roll the dough in 1/8" thickness. When finished, slide a metal spatula between the dough and counter to be loosen. This will prevent the cookies from sticking.

Here, I cut with my knife and try to give each cookie in a square shaped. Use a metal spatula to lift and transfer to cookie sheet. The cookies will not spead during baking, so they may be arranged quite close together. Set the sheets aside. Gather up, knead and re-roll the remaining dough scraps, likewise cutting and arranging on a cookie sheet.

Do some design a top of each cookie. Once the cookies have been decorated, bake for 12 minutes or until firm to touch. If your oven has an uneven heating element, rotate the cookie sheets after 6 minutes. Once the cookies have baked, cool thoroughly directly on the cooling rack.

TO MAKE THE FILLING:
With a hand mixer, cream together butter, powdered sugar, salt and vanilla extract. Cream on medium speed for 5 minutes; use a rubber spatula to scrape the bowl down periodically. Using a spatula to transfer the filling to a pastry bag or ziploc bag with the corner snipped off.

TO ASSEMBLE THE COOKIES:
Flip half the wafers upside down. Onto each pipe 1 tsp of filling directly into the center. To finish, top with remaining wafers and press down with your fingers, applying very even pressure so the filling will spread uniformly across the cookie.

Transfer cookies to an airtight containter and refrigerate for several hours. This is crucial. After whipping the filling, it will be quite soft. Refrigerating it will solidify the filling, restoring its proper texture and bonding it with the wafers. Serve and enjoy!

If you want to either share or enhance your baking skills, join us for a monthly baking adventure at Baking Partners.
 
 
You may like these recipes too:


Friday, September 14, 2012

ULTIMATE CHOCOLATE CREAM CHEESE COOKIES

Baking Partners, a baking group created and hosted by Swathi Iyer, I am a part of  this group, this time Baking Partners decided to go with the theme cookies. Being part of the 'Baking Partners - A Group of Home Bakers', our challenge for this month, Suggested by Tina of  http://www.pinaycookingcorner.com/ suggested, Ultimate Chocolate Cream Cheese Cookies from 'Food & Wine Best of the Best Cookbook Recipes Vol. 14.'

Here it is a simpliest and most favourite cookies recipe, the best ever chocolate cream cheese cookies. These cookies truely are as good as they look, with a soft dense inside, and little harden from outside. These cookies are every bit of comfort you could possibly need and they are as good as they sound.

INGREDIENTS:
2 1/4 cup All Purpose Flour
1/4 cup Unsweetened Cocoa powder
2 tsps Baking Soda
1/2 tsp Salt
2 sticks / 226 gm Unsalted Butter (soften)
4 Oz Cream Cheese, at room temperature
1 cup Granulated Sugar
1/2 cup Dark Brown Sugar
2 Large Eggs
2 tbsps Heavy Cream
1 tsp Pure Vanilla Extract
3 OZ Bittersweet Chocolate (melted and cooled)
8 OZ / 225 gm of Semi-sweet Chocolate Chips 


METHOD:
Preheat the oven to 350 F and line two baking sheets with parchment paper.

In a medium bowl, shift the flour with cocoa powder, baking soda and salt. In a large bowl, combine butter, cream cheese, granulated sugar and brown sugar. Beat about 3 minutes, with a electric hand mixer until fluffy.

Scrap down the sides of the bowl. Beat in the eggs, heavy cream and vanilla until blended.

At low speed, beat in the dry ingredients. Add the melted chocolate and chocolate chips and beat just until incorporated.

Cover the bowl and refrigerate the dough for at least 15 minutes or upto 2 hours.

Scoop heaping tablespoons of cookie dough onto the prepared baking sheets, spacing them 2 inches apart. Bake for 12-15 minutes until the cookies are just set. Shift the baking sheet for top to bottom and front to back half way through. Let the cookies cool on the baking sheets for 5 minutes, then transfer them to a rack to cool completely.

The cookies can be stored in an airtight container for upto 3 days.

If you want to either share or enhance your baking skills, join us for a monthly baking adventure at Baking Partners!

You might like:


CORNFLAKE COOKIES

Baking Partners, a baking group created and hosted by Swathi Iyer, I am a part of this group, this time Baking Partners decided to go with the theme cookies. Being part of the 'Baking Partners - A Group of Home Bakers' , our challenge for this month, suggested by Priya of Priya's Versatile Recipes is "Cornflake cookies from a cookbook called Baking: A Commonsense Guide by Murdoch Book."
I used Kelloggs cornflakes and they tested absolutely delightful, crunchy and addictive. Butter rich coconut cookies rolled with crunchy cornflakes. Every bite is a perfect crunch. It melts in your mouth with buttery coconut and raisins, just heavenly.
INGREDIENTS:
4 OZ / 125  gm softened Unsalted Butter
3/4 Cup Sugar
2 nos Eggs
1 tsp Vanilla Extract
1&1/2 cups dessicated Coconut
2 tbsps Black Raisins
1/2 tsp Baking Soda
1/2 tsp Baking Powder
2 Cups All Purpose Flour
2 Cups Crushed Cornflakes (Kelloggs brand)

METHOD:
Sieve the flour with baking powder and baking soda.

Cream the butter and sugar in a bowl, using electric beaters untill they turn light and fluffy.
Gradually add the egg, beating thoroughly after each addition, add vanilla extract and beat untill they well combined.
Now add raisins and coconut, give a stir.
Fold the flour mixture with a metal spoon and stir until the mixture is almost smooth.
Preheat the oven to 350 F, line two baking trays with baking papers.

Put the crushed cornflakes in a shallow dish, then drop tablespoon of this cookie mixture onto the cornflakes and roll it into a flat ball.
Arrange on the trays. Bake for 20 minutes or till it turns golden.

Cool completely. Keep it in an air tightened box. At room temperature these cookies will keep fresh for 5 days.

If you want to either share or enhance your baking skills, join us for a monthly baking adventure at 'Baking Partners'.
 

Wednesday, August 15, 2012

REINE DE SABA AVEC GLACAGE AU CHOCOLAT (CHOCOLATE ALMOND CAKE) : A TRIBUTE TO JULIA CHILD

“Just like becoming an expert in wine–you learn by drinking it, the best you can afford–you learn about great food by finding the best there is, whether simply or luxurious. The you savor it, analyze it, and discuss it with your companions, and you compare it with other experiences.”
Julia Child, Mastering the Art of French Cooking

This is my heartiest tribute to the culinary legend Julia Child, in honour of her 100th birthday on 15th August, 2012. There are lot of chefs arround the world I admire, Julia Child is one of them. A chef, a writer or she is such a personality who introduced French cuisine among Americans. The late American culinary icon is being celebrated with dinners, events and parties in Boston and across the United States. Her popular TV show, "The French Chef" changed the way Americans cooked, ate or even thought about food.
Now, I am for the first time a part of the group called Baking partners, a baking group hosted by Swathi Iyer. Being part of the 'Baking Partners - A Group of Home Bakers' our challenge for this month is Julia Child's famous Reine de Saba Avec Alacage au Chocolat which is Chocolate Almond Cake.

This is a chocolate almond cake with chocolate-butter icing and almond meal, absolutely delicious. Very rich in chocolate, flovored with spiced rum and almond extract, simple and short time baked cake. Not so much fluffy, but still moist inside, really delectable one. It is just one layered cake, easy and simple chocolate icing with almond dressing just perfect and luscious for any special occassion. Rum enhances the flavor of this cake while mixed up with the chocolate...


INGREDIENTS:

CAKE FOR 9" SQUARE PAN:
4.5OZ / 4&1/2 Squares / 127.57 gm Semi Sweet Baking Chocolate (I used Ghirardelli Chocolate)
2&1/3 tbsps Spiced Rum (Sailor Jerry brand)
4 OZ / 1stick + 1 tbsp / 127 gm Softened Unsalted Butter
3 Eggs (yolk and white seperated)
1 cup Granulated Sugar
A pinch of Salt
1 tbsp & 1/2 tsp Granulated Sugar
3/4 cup / 73.12 gm Pulverized (ground) Almond
1/2 tsp Almond Extract (use less if you don't like too much almond flavor)
2/3 cup or 64 gm All Purpose Flour
1 tbsp Corn Flour

FOR CHOCOLATE ICING:
2.25 OZ / 2 + 1/4 squares / 63.7 gm Semi Sweet Baking Chocolate
2&1/3 tbsps Spiced Rum
7 tbsps Softened Unsalted Butter
Note: Add about 3/4 cup sliced almonds to the ingredients for decoration. Instead of rum, you may use coffee.


METHOD:
FOR THE CAKE:
Preheat the oven to 350 F / 180 C.

Butter and flour the cake pan. Set aside.

In a steel bowl mix chocolate and rum. Place it over another larger bowl with boiling water. Chocolate will melt after 5 minutes. While chocolate melts, let proceed with the recipe. Measure all rest of the ingredients.

Cream the butter and sugar together for several minutes until they form a pale yellow fluffy mixture. Beat the egg yolks until they well blended.

Beat egg whites and salt in a seperate bowl until soft peaks are formed (gradually increase the speed of electric hand mixer and blend for about 5 minutes). Sprinkle on the sugar and beat until stiff peaks are formed.

With a rubber spatula, blend the melted chocolate into the butter and sugar mixture, then stir in the ground almonds and almond extract. Immediately stir in one-fourth (1/4th) of the beaten egg whites to lighten the batter. Delicately fold in a third (1/3rd) of the remaining whites and when partially blended, sift on one-third (1/3rd) of the flour and continue folding. Alternate repidly with more egg whites and more flour untill all egg whites and flour are incorporated.

Turn the batter into the cake pan, pushing the batter upto its rim with a rubber spatula. Bake in middle level of preheated oven for 25 minutes. Cake is done when it has puffed, and 2&1/2 to 3 inches arround the circumference are set so that a toothpick plunged into that area comes out clean; the centre should move slightly if the pan is shaken, and a toothpick comes out oily.

Allow cake to cool in the pan for 10 minutes. Run a knife arround the edge of the pan, and reverse cake on the rack. Allow it to cool for two hours; it must be thoroughly cold if it is to be iced.

To serve, use the chocolate-butter icing recipe below and then press a desigh of almonds over the icing. 

FOR THE ICING:
A bowl filled with a tray of ice cubes and water to cover them and set aside.

Place the chocolate and rum or coffee in a small pan, cover, and set in a larger pan of almost simmering water. Remove pans from heat and let chocolate melt for 5 minutes or so, until perfectly smooth. Lift chocolate pan out of the hot water, and beat in the butter a tablespoon at a time. Then beat over the ice and water until chocolate mixture has cooled to spreading consistency. At once spread it over the cake cake with spatula.

Place cake on platter or tray. Scrape icing onto top center. Using small offset spatula, spread icing evenly and thinly over top and sides of cake.

Then press a design of almonds over the icing.

If you want to either share or enhance your baking skills, join us for a monthly baking adventure at Baking Partners!


Sunday, July 29, 2012

Baking Partners: A new Baking Group Announcement

You are invited to join Baking Partners!


Baking a homemade bread, cake or cookies will give the best outcome. However in order to achieve the best results, a perfect recipe and right techniques are required.

We are a small group of home baker friends, who love and want to learn more the nook and corners of baking.  We are planning to try out recipes from books/magazines and cooking shows. Every member gets a chance to present their choice of recipe and share important points with the rest of the group.

Main purpose of this group is to learn the techniques, critic the procedure if there are ways to improve, and to eat a delicious food.
Rules are simple, we will choose one recipe and send it out to the group by 16th of every month and the reveal date will be 15th of the next month . On that day we will blog about it. A linky tool will be open during that time and each member can link their post.
First month we are going to do a recipe, 2nd and 3rd month will be a theme and the 4th month we will be back at a recipe. By doing in between recipes, we will able to learn more.
All enthusiastic bloggers interested in baking are welcome, please email Swathi, at favoriterecipes12@gmail.com
We will appreciate the use of logo or worded link that will help to spread the word. A bunch of thanks to Tina for designing this beautiful logo.

If you want to make it a gluten or vegan free diet, you can do those modifications also.


   Baking Partners are
Archana (Tangy Minds)
Reshmi (EasY Cook)
Pratibha (Cook Ezee)
Swasthi Blank (Swasthi The Health Freak)


Cheers!!!

Sanoli